Keonhacai 88 – Tỷ lệ kèo nhà cái uy tín hôm nay – tip xem kèo
Keonhacai không còn xa lạ với những anh em chuyên về cá độ bóng đá. Trên bảng tỷ lệ kèo nhà cái luôn có đầy đủ các loại kèo cược cho người chơi lựa chọn. Để biết cách đánh như thế nào thì cần đọc được hết các loại đó. Vậy đọc như thế nào cũng cùng kèo nhà cái khám phá ngay bài viết bên dưới nhé!
Giới thiệu về keonhacai
Cá độ bóng đá là bộ môn được đông đảo cược thủ ưa chuộng. Không chỉ vì tính giải trí cao mà đây chính là cơ hội làm giàu nhanh cho các cược thủ. Để chơi cá độ bắt cuộc anh em phải lựa chọn cho mình loại kèo phù hợp để tham gia.
Trong bóng đá có rất nhiều loại kèo, từ cược chính đến phụ đều có đủ. Các loại này được thể hiện tất cả trên bảng tỷ lệ keonhacai. Anh em sẽ theo dõi và lựa chọn loại phù hợp nhất với mình. Tùy vào mỗi trận đấu mà nhà cái sẽ tung ra các loại tỷ lệ thích hợp nhất.
Trước khi trận đấu diễn ra từ 2 – 4 này, các nhà cái uy tín sẽ tung ra tỷ lệ kèo cược. Điều này giúp cho bet thủ có thể dựa vào đó để nhận định, soi kèo. Tuy nhiên, anh em cần lưu ý trên bảng tỷ lệ kèo thường biến động liên tục. Bởi vậy, người tham gia cần theo dõi kỹ càng để tránh bị mắc bẫy từ nhà cái nhé!

Những lợi thế của cược thủ khi tham gia keonhacai
Tham gia kèo nhà cái có nhiều cái lợi cho người chơi, đặc biệt giảm được rủi ro. Dưới đây là một số lợi ích hàng đầu mà anh em cần biết, đó là:
Đánh giá được sức mạnh của các đội thi đấu
Trên bảng tỷ lệ keonhacai anh em sẽ thấy các thông tin quan trọng của hai đội khi thành tích, đội hình, lịch sử đối đầu,… với thông tin này sẽ giúp anh em đánh giá dễ dàng đâu là đội kèo trên đâu là đội nằm dưới. Khi thấy rõ yếu tố đó thì việc đưa ra kết quả dự đoán cũng chính xác hơn nhiều.
Có được thông tin sớm nhất
Những số liệu được cung cấp sớm, chuẩn chính xác sẽ giúp người chơi nhận định, soi kèo đúng đắn. Trên bảng keonhacai uy tín luôn lấy dữ liệu từ những nguồn tin chính xác nên cược thủ hoàn toàn có thể yên tâm sử dụng.
Dễ dàng xây dựng được kế hoạch đặt cược
Lợi ích của bet thủ khi theo dõi bảng tỷ lệ kèo nhà cái chính là có thể xây dựng được chiến thuật đánh phù hợp nhất. Với chiến lược thông minh sẽ tăng tỷ lệ thắng cao hơn cho mỗi tay chơi.

Các loại tỷ lệ keonhacai phổ biến nhất trong bóng đá
Khi tham gia cá độ bóng đá anh em sẽ thấy có nhiều loại kèo cược để lựa chọn sao cho phù hợp nhất. Trong đó, có cả kèo chính lẫn cược phụ đều đem tới cơ hội ăn kèo ngon cho mọi tay chơi. Dưới đây là một số loại cược chính mà anh em thường gặp nhất như sau:
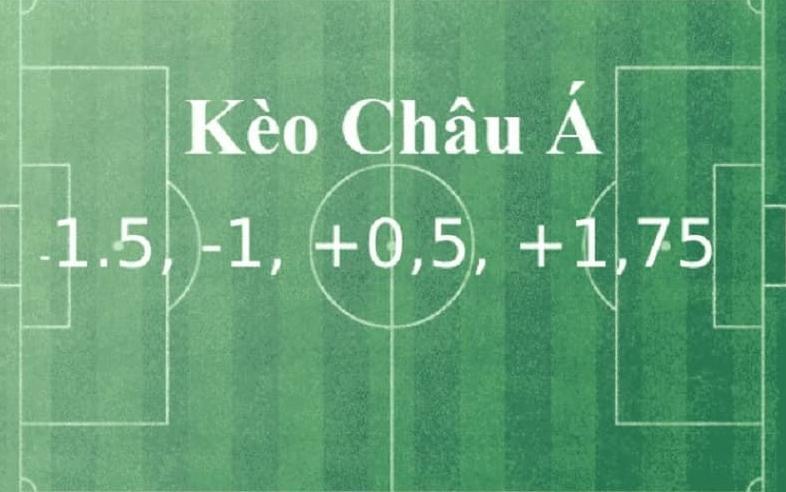
Kèo Châu Á (Handicap)
Đây là một loại cược chính trong bóng đá có tên gọi khác là kèo chấp hay Handicap. Khi tham gia các trận đấu lớn anh em dễ dàng bắt gặp được loại này. Nếu nhà cái thấy rõ được sự chênh lệch về phong độ, thực lực sẽ tung ra loại kèo này.
Theo đó, kèo Châu Á có nhiều loại tỷ lệ khác nhau. Khi theo dõi trên bảng tỷ lệ keonhacai anh em có thể sẽ thấy loại chấp 1 trái, chấp 1/2 trái,… Để tìm hiểu chi tiết hơn, anh em theo dõi tiếp những nội dung dưới đây nhé!

Tỷ lệ kèo đồng banh
Nếu loại tỷ lệ này được đưa ra thì đồng nghĩa với việc hai đội bóng có sự ngang bằng nhau. Do đó, nhà cái sẽ đưa ra mức chấp là 0 trái và đọc như sau:
- Cả trận đội mạnh thắng, anh em cược tiền sẽ thắng tất.
- Cả trận đội mạnh và đội yếu hòa nhau đặt cửa nào cũng sẽ được hoàn lại.
- Cả trận nếu đội dưới thắng, đặt tiền vào đó có tất cả tiền thưởng.
Đồng banh nửa trái
Theo dõi trên bảng tỷ lệ keonhacai cược thủ cũng dễ dàng bắt gặp loại cược đơn giản này. Đồng bạn nửa trái hay chính là chấp 1/4 hay 0.25 trái. Nếu hai đội bóng có sự chênh lệch không quá nhiều về thực lực thi đấu sẽ được nhà cái đưa ra. Khi này đọc kèo như sau:
- Toàn trận đội mạnh hơn thắng, đầu tư vào đó sẽ ăn sạch.
- Toàn trận đội yếu hơn giành chiến thắng, anh em vào tiền ăn đủ.
- Toàn trận hai bên hòa nhau, cược thủ đầu tư vào đội mạnh sẽ mất 1/2, còn nếu cược cho đội yếu hơn thắng 1/2.
Cược chấp 1/2 trái
Kèo chấp 1/2 hay chính là chấp 0.5 trái được nhà cái đưa ra khi sự chênh lệch không quá lớn. Khi này nhìn trên bảng kèo nhà cái sẽ có cách đọc như sau:
- Trường hợp đội nằm kèo trên thắng, anh em xuống tiền ăn đủ.
- Trường hợp đội yếu hơn thắng hay hòa, đầu tư vào đó ăn tất, còn đặt cho đội mạnh hơn thua sạch.
Cược chấp 3/4 trái
Trên bảng tỷ lệ keonhacai thì loại này có tên khác là chấp 0.75 trái. Để biết cách chơi, anh em hãy xem ngay cách đọc chi tiết bên dưới.
- Toàn trận đội mạnh hơn thắng từ 2 bàn trở lên, cược thủ vào tiền có được tất tiền thưởng.
- Toàn trận đội mạnh hơn thắng duy nhất 1 bàn, nếu anh em đặt tiền sẽ ăn 1/2, còn cược cho kèo dưới thua 1/2.
- Toàn trận đội dưới có chiến thắng, anh em vào tiền ăn tất cả tiền cược.
Tỷ lệ cược chấp 1 trái
Nếu hai đội bóng thi đấu mà có sự chênh lệch rõ ràng về phong độ, thực lực thì nhà cái đưa ra tỷ lệ chấp là 1 trái. Khi này cách đọc đơn giản như sau:
- Nếu cả trận đội mạnh hơn thắng từ 2 bàn, cược thủ đặt tiền sẽ chiến thắng, còn nếu cược cho đội dưới thua tất.
- Toàn trận đội mạnh hơn chỉ thắng đúng 1 bàn, anh em vào tiền cửa nào cũng được hoàn lại.
- Toàn trận đội kèo dưới thắng hay hòa, người chơi đầu tư vào đó ăn đủ, còn đặt cho kèo trên thua sạch sẽ.

Keonhacai – Cược chấp 1-1.5 trái
Đây cũng là một loại tỷ lệ phổ biến của kèo châu Á. Cược này chơi không khó và đọc cũng đơn giản như sau:
- Nếu tất cả trận đấu đội mạnh hơn thắng từ 2 bàn trở lên, vào tiền sẽ ăn được hết tiền cược ban đầu.
- Nếu tất cả trận đấu đội mạnh hơn thắng 1 bàn duy nhất, anh em đặt thua 1/2, còn đặt cho kèo dưới thắng 1/2.
- Nếu tất cả trận đấu đội yếu hơn thắng hay thua vào tiền cũng ăn đủ.
Tỷ lệ chấp 1.75 trái
Khi các đội bóng có sự chênh lệch cá cao thì nhà cái cũng sẽ đưa ra loại tỷ lệ này và đọc như sau:
- Nếu toàn trận đội kèo trên thắng với tỷ số 3 bàn hoặc cao hơn, cược thủ đặt tiền vào đó ăn tất, còn nếu đánh vào kèo dưới thua sạch.
- Nếu toàn trận đội kèo trên thắng 2 bàn duy nhất, anh em xuống tiền sẽ ăn 1/2, còn cược cho kèo dưới thua 1/2.
- Nếu toàn trận đội kèo trên chỉ thắng đúng 1 bàn, đặt tiền vào đó sẽ thua hết, còn đầu tư cửa dưới có đủ lợi nhuận.
Cược chấp 2 trái
Trong bảng tỷ lệ keonhacai thì khi hai đội bóng có sự chênh lệch rõ nhất sẽ được nhà cái tung ra loại cược này. Cách đọc chuẩn nhất như dưới đây:
- Trong cả trận đấu khi đội cửa dưới thắng đúng 1 bàn, người chơi đầu tư vào đó sẽ thắng tất, còn nếu đánh vào cửa trên thua hết.
- Trong cả trận đấu khi đội cửa trên thắng 2 bàn, người chơi đặt cho đội nào cũng được hoàn tiền.
- Trong cả trận đấu khi đội cửa trên thắng từ 3 bàn thắng, anh em vào tiền sẽ ăn đủ, còn nếu cược đội dưới thua hết.
Loại tỷ lệ chấp 2.25 trái
Trong trường hợp nhà cái đưa ra loại tỷ lệ này thì cách đọc sẽ như dưới đây:
- Cả trận đấu đội nằm trên thắng từ 3 bàn trở lên, khi vào tiền sẽ ăn tất cả tiền thưởng.
- Cả trận đấu đội nằm trên chỉ thắng 2 bàn hoặc ít hơn, anh em vào tiền mất 1/2, còn đặt cho đội dưới ăn 1/2.
- Cả trận đấu đội nằm dưới hòa hay thua nếu vào tiền đều ăn đủ.
Kèo Châu Âu (1×2)
Đây cũng là một loại kèo chính trong bóng đá và được khá nhiều anh em lựa chọn khi cá độ. Đối với cược này thì chỉ có 3 cửa cho anh em lựa chọn nên tỷ lệ thắng là 33.33%. Theo đó, khi quan sát trên bảng tỷ lệ keonhacai anh em sẽ thấy các cửa cược sau:
- 1: Đầu tư cho đội chủ nhà thắng.
- 2: Đầu tư cho đội khách thắng.
- X: Đặt tiền nếu cho rằng hai bên sẽ hòa nhau.

Kèo Tài xỉu – keonhacai
Loại cược này chơi cũng khá đơn giản, dễ hiểu và cũng có nhiều loại tỷ lệ khác nhau. Chính vì thế người chơi cần tìm hiểu kỹ càng nếu muốn giành chiến thắng.
Khi này, cược thủ sẽ dự đoán cả hai đội ghi được tất cả bao nhiêu bàn thắng trong 90 phút trận đấu. Còn đội nào mạnh hay yếu thì không cần quan tâm. Cụ thể dưới đây là một số tỷ lệ kèo Tài xỉu như sau:
Tỷ lệ Tài xỉu 0 trái
Khi nhà cái tung ra loại tỷ lệ này thì cách đọc sẽ như sau:
- Nếu cả trận đấu tổng bàn thắng từ 1 bàn trở lên, người chơi đầu tư vào Tài ăn đủ.
- Nếu cả trận đấu không có bàn thắng nào, đầu tư vào Tài thua, đánh cho Xỉu thắng.
Tài xỉu 1 trái
Đối với trường hợp này sẽ có cách đọc như sau:
- Trường hợp cả trận đấu có tổng bàn thắng từ 2 trái trở lên, nếu người chơi đặt cho Tài sẽ ăn đủ.
- Trường hợp cả trận đấu không có bàn thắng nào, khi anh em vào tiền cửa Tài sẽ thua sạch.
- Trường hợp cả trận đấu có đúng 1 bàn thắng, đầu tư vào Tài thua nửa, đánh cho Xỉu thắng nửa tiền.
Loại tỷ lệ Tài xỉu 1.25 trái
Trên bảng tỷ lệ keonhacai thì đây là loại cược thông dụng nên rất được ưa chuộng. Khi này anh em sẽ chơi như sau:
- Khi toàn trận đấu có từ 2 bàn thắng trở lên, nếu đầu tư cửa Tài thắng tất, còn đánh cho Xỉu thua đậm.
- Khi toàn trận đấu không có 1 bàn thắng nào, đánh cho Tài mất tất, cược cho Xỉu thắng toàn bộ.
- Khi toàn trận đấu có đúng 1 bàn thắng, anh em đầu tư vào Tài ăn 1/2, đánh cho Xỉu mất 1/2.
Tài xỉu 1.5 trái phổ biến tại bảng keonhacai
Đối với loại này thì cách đọc cũng rất đơn giản như sau:
- Trường hợp toàn trận có tổng bàn thắng cao hơn 1 trái, người chơi đánh cửa Tài thắng lớn.
- Trường hợp toàn trận có tổng bàn thắng duy nhất là 1 hay không có bàn nào, anh em đầu tư vào Xỉu thắng lớn, cược cho Tài thua hết.
Loại tỷ lệ 1.75 trái
Đối với loại này cũng rất thông dụng và cách đọc đúng nhất như sau:
- Trường hợp toàn trận có tổng bàn thắng nhiều hơn 2 trái, anh em vào cửa Tài thắng toàn bộ, còn chơi cửa xỉu mất tất.
- Trường hợp toàn trận có tổng bàn thắng chỉ có 2 trái, nếu đánh vào Tài ăn 1/2, đánh cho Xỉu thua 1/2.
- Trường hợp toàn trận có tổng bàn thắng dưới 2 trái, anh em đầu tư cho Xỉu ăn đủ, đánh cho Tài mất tất.
Loại tỷ lệ Tài xỉu 2 trái
Trên bảng keonhacai thì Tài xỉu 2 trái có cách đọc đơn giản như sau:
- Khi cả trận có tổng bàn thắng lớn hơn 2 trái, anh em vào tiền cho Tài ăn tất, cược cho Xỉu mất trắng.
- Khi cả trận có tổng bàn thắng duy nhất là 2, nếu đánh vào Tài thua 1/2 và cược cho Xỉu được 1/2.
- Khi cả trận có tổng bàn thắng nhỏ hơn 2, cược thủ đánh vào Xỉu ăn sạch tiền, cược cho Tài mất trắng.

Tỷ lệ 2/2.5 trái
Trên bảng kèo anh em dễ dàng thấy được loại tỷ lệ quen thuộc này và cách đọc như sau:
- Tổng bàn thắng của toàn trận từ 3 bàn trở lên, đầu tư tiền vào Tài ăn sạch, còn đánh cho Xỉu mất tất.
- Tổng bàn thắng của toàn trận có từ 1 trái trở xuống, đánh Tài thua trắng, đặt tiền vào Xỉu ăn đủ.
- Tổng bàn thắng của toàn trận là 2 bàn, chơi vào cửa Tài mất 1/2, đánh vào Xỉu thắng 1/2.
Loại tỷ lệ Tài xỉu 2.5 trái
Khi anh em chơi loại này thì cần biết cách đọc như sau:
- Trường hợp tổng bàn thắng cả trận bóng có từ 3 trái trở lên, nếu anh em vào tiền cửa Tài sẽ ăn đủ, còn đánh cho Xỉu mất sạch.
- Tổng bàn thắng của toàn trận dưới 2 trái, nếu đánh vào Tài thua đủ, còn cược cho Xỉu thắng đậm.
Loại Tài xỉu 2.5/3 trái
Kèo Tài xỉu 2.5/3 trên bảng tỷ lệ keonhacai có cách đọc đơn giản như dưới đây:
- Trường hợp toàn trận có tổng bàn thắng từ 4 trái trở lên, nếu người chơi đánh hết vào Tài ăn ngay kèo ngon, còn cược cho Xỉu mất tất.
- Trường hợp toàn trận có tổng bàn thắng ít hơn 2 trái, đánh vào Xỉu ăn đủ, cược cho tài thua hết.
- Trường hợp toàn trận có tổng bàn thắng 3 trái, đầu tư vào Tài ăn 1/2 và đánh cho Xỉu thua 1/2.
Loại Tài xỉu 3 trái
Nhìn trên bảng keonhacai thì cách đọc của loại Tài xỉu 3 trái như sau đây:
- Nếu tổng số bàn thắng cả trận 90 phút từ 4 bàn trở lên, bet thủ đầu tư cho tài thắng tất, còn cược cho Xỉu thua sạch.
- Nếu tổng số bàn thắng cả trận 90 phút ít hơn 2 trái, đánh Tài thua, đầu tư Xỉu thắng kèo.
- Nếu tổng số bàn thắng cả trận 90 phút là 3 trái, đánh cửa nào cũng được hoàn cược.
Loại tỷ lệ 3/3.5 trái
Với loại này đòi hỏi người chơi phải dự đoán con số rất lớn, cách đọc như sau:
- Trường hợp tổng số bàn thắng cả trận nhiều hơn 4 bàn, đầu tư vào Tài thắng kèo, đánh cho Xỉu mất trắng.
- Trường hợp tổng số bàn thắng cả trận là 2 hay ít hơn, đánh vào Tài mất tiền, cược vào Xỉu ăn đủ.
- Trường hợp tổng số bàn thắng cả trận bằng 3 bàn, đầu tư Xỉu ăn 1/2, đánh Tài mất 1/2.
Một số loại tỷ lệ keonhacai khác
Bên cạnh các loại kèo chính trên thì trên bảng tỷ lệ cũng xuất hiện nhiều loại kèo phụ khác. Dưới đây anh em hãy tham khảo loại kèo phù hợp nhất và lựa chọn tham gia nhé!

Cược thẻ phạt
Trên bảng tỷ lệ kèo nhà cái anh em có thể lựa chọn cho mình loại kèo thẻ phạt tham gia. Khi này cược thủ sẽ dự đoán tổng số thẻ đỏ hoặc thẻ vàng trong cả trận đấu đó. Nhà cái đưa ra một con số bất kỳ và người chơi dự đoán con số cao hoặc nhỏ hơn số bất kỳ đó.
Cược phạt góc
Đây cũng là loại kèo phụ phổ biến và cực kỳ dễ chơi nên tỷ lệ thắng là rất cao. Theo đó, nhà cái cũng tung ra một con số ngẫu nhiên và người tham gia dựa vào đó để dự đoán tổng số phạt góc là bao nhiêu.
Cược rung
Trên bảng tỷ lệ keonhacai thì loại này còn có tên gọi khác là kèo running. Người chơi tham gia loại này sẽ đặt cược được vào bất cứ thời gian nào khi trận đấu diễn ra. Có thể thấy loại này chơi khá đơn giản và càng cược vào cuối trận thì tỷ lệ thắng càng cao. Tuy nhiên, anh em cần theo dõi liên tục trận đấu để nắm bắt diễn biến chuẩn nhất.
Cược chẵn lẻ
Tỷ lệ thắng của loại này là 50/50, cơ hội cho anh em kiếm tiền là đây. Theo đó, bet thủ sẽ dự đoán tổng số bàn thắng cả trận là chẵn hay lẻ. Nếu trùng kết quả anh em sẽ có được khoản tiền vô cùng hấp dẫn.
Cược tổng số bàn thắng
Loại này chơi cũng khá dễ dàng, cược thủ sẽ dựa vào con số được nhà cái đưa ra và dự đoán cho mình con số ứng ý nhất.
Cược bàn thắng đầu cuối
Khi chơi loại này thì anh em sẽ dự đoán đội nào có được tỷ số đầu tiên và bên nào ghi bàn cuối cùng. Kèo này chơi đơn giản, có hội thắng cao và chủ yếu dựa vào may mắn.
Các yếu tố tác động đến tỷ lệ keonhacai là gì?
Trước khi trận đấu diễn ra thì bảng tỷ lệ kèo nhà cái sẽ có nhiều sự biến động. Đó là vì những yếu tố sau:
Do thông tin trận đấu
Để có được loại kèo phù hợp nhất cho trận đấu thì nhà cái cần phân tích các thông tin như phong độ, đá sân nhà hay sân khách, thành tích,… Dựa vào đây để xác định loại tỷ lệ kèo chuẩn cho trận đấu đó.
Tác động do sức hút của trận bóng
trên bảng tỷ lệ kèo nhà cái sẽ chịu ảnh hưởng từ sức hút của trận đấu đó. Nếu như các đội bóng mạnh đối đầu với nhau thì họ sẽ thi đấu hết sức để có được bàn thắng. Do đó, nhà cái sẽ giảm tỷ lệ kèo nhằm thu hút thêm cược thủ và để trận đấu được hấp dẫn, thú vị hơn.
Do biến động thị trường
Đây là một trong những yếu tố có tác động đến tỷ lệ keonhacai rõ rệt. Nếu nhà cái thấy sự chênh lệch khoản tiền đặt cược ở mỗi đội bóng sẽ thay đổi ngay tỷ lệ kèo. Điều này nhằm mục đích không để xảy ra rủi ro và tạo nên sự cân bằng nhất.
Chênh lệch phong độ, thực lực
Nếu có sự chênh lệch giữa hai đội so kè cùng nhau thì đội bóng nào được đánh giá mạnh hơn tỷ lệ kèo sẽ thấp hơn. Bởi lẽ xác suất thắng khi đó sẽ cao hơn nhiều.

Chiến thuật thắng lớn khi chơi keonhacai
Muốn giành chiến thắng thì cần biết cách đọc cụ thể về các loại tỷ lệ kèo cược. Bên cạnh đó, cược thủ cũng cần có kinh nghiệm và dưới đây là một số bí quyết cực hay từ cao thủ, anh em tham khảo ngay nhé!
Hiểu rõ về các loại kèo nhà cái
Anh em cần biết trong bóng đá có bao nhiêu loại kèo cược và cách đọc cụ thể ra sao. Cần có kiến thức về các loại tỷ lệ kèo đó để phân tích, tính toán kỹ lưỡng nhằm dự đoán kết quả chính xác nhất. Bên cạnh đó, anh em cũng sẽ tự tin hơn khi đặt cược vào trận đấu mình muốn.
Chọn nhà cái uy tín khi đặt cược
Tham gia keonhacai thì cần chọn cho mình một sân chơi uy tín, an toàn. Điều này giúp cược thủ tránh được những rủi ro và không bị mắc bẫy từ nhà cái giả mạo. Theo đó, cần đánh giá chi tiết về các tiêu chí như có giấy phép hợp pháp, bảo mật thông tin an toàn, giao dịch nhanh chóng,…
Hơn nữa, những đơn vị uy tín sẽ cung cấp thông tin chính xác 100%, cập nhật nhanh chóng và đầy đủ nhất. Bên cạnh đó, trên bảng kèo cũng ít sự biến động nên cược thủ sẽ tránh được nhiều rủi ro hơn.

Cần tìm hiểu và nghiên cứu kỹ các thông tin về trận đấu
Trên bảng tỷ lệ keonhacai luôn cung cấp đầy đủ các thông tin chính xác về trận bóng đó. Nếu người chơi cập nhật càng sớm thì cơ hội chiến thắng cáng cao. Bởi lẽ khi này anh em có thời gian nhận định và soi kèo nhiều hơn. Đảm bảo kết quả dự đoán cũng chính xác hơn nhiều tăng tỷ lệ chiến thắng cao hơn.
Theo đó, với các thông tin mà anh em cần có được như: Thực lực của hai đội bóng, lịch sử đối đầu, đội hình ra sân, cầu thủ chấn thương, đá sân khách hay sân nhà,… Càng có được nhiều số liệu về trận đấu thì cơ hội thắng càng cao hơn.
Quan sát kỹ bảng tỷ lệ keonhacai
Trên bảng kèo nhà cái sẽ có sự biến động thường xuyên trước khi trận đấu bắt đầu. Do đó, anh em cần theo dõi thường xuyên để cập nhật nhanh những biến động đo. Điều này sẽ giúp cược thủ có những thay đổi cho mình để không bị rơi vào bẫy nhà cái.
Quản lý vốn và biết cách phân chia hợp lý
Nhiều anh em vì quá tự tin với kết quả của mình mà tất tay trong một ván. Tuy nhiên, anh em không hề biết rằng bóng đá luôn có nhiều điều bất ngờ xảy ra. Chính vì thế cách chơi thông minh là quản lý tiền cược và đặt nhỏ lẻ sao cho phù hợp nhất. Tuyệt đối không tất tay trong bất kỳ trường hợp nào. Bởi lẽ sẽ xảy ra nhiều rủi ro mà không thể lường trước.
Biết cách dừng chơi đúng thời điểm
Dù thắng hay thua cũng cần dừng chơi đúng lúc, không nên chơi quá liều. Nếu thắng với khoản lợi nhuận kha khá hãy dừng lại để có lời lãi. Còn khi anh em thua liên tiếp vài ván cũng nên dừng ngay để bảo toàn vốn vf giúp tâm lý bình tĩnh hơn.
Bình tĩnh, thoải mái khi chơi
Hãy giữ cho mình tâm lý thoải mái khi tham gia các loại tỷ lệ keonhacai. Nếu không thể giữ bình tĩnh thì nên dừng lại cuộc chơi và quay lại ngày gần nhất. Tâm lý bị ảnh hưởng sẽ khiến kết quả dự đoán bị sai lệch rất nhiều và tỷ lệ thua là cực kỳ cao.
Kết luận
Bài viết trên đây được chúng tôi đem tới cho anh em về các loại tỷ lệ keonhacai phổ biến nhất. Qua đây hy vọng anh em sẽ biết cách đọc chuẩn nhất cho mình. Đồng thời có được cách chơi hiệu quả nhất giúp anh em dễ dàng ăn kèo ngon.